One of the core functionalities of ZenDesk is its ticketing system, which is used to gather data from clients: their names, contact information, and summary of issues. These tickets also allow inter-communication between ZenDesk users and groups, as well as providing a running commentary on an issue's resolution. There are several ways a client can create a ticket:
- Emailing the support email address
- Submitting a ticket via the chat system
- Having their issue transcribed by a customer liaison over the phone
- Sending a message via Facebook messenger
Let's take a look at a sample ticket from start to finish.
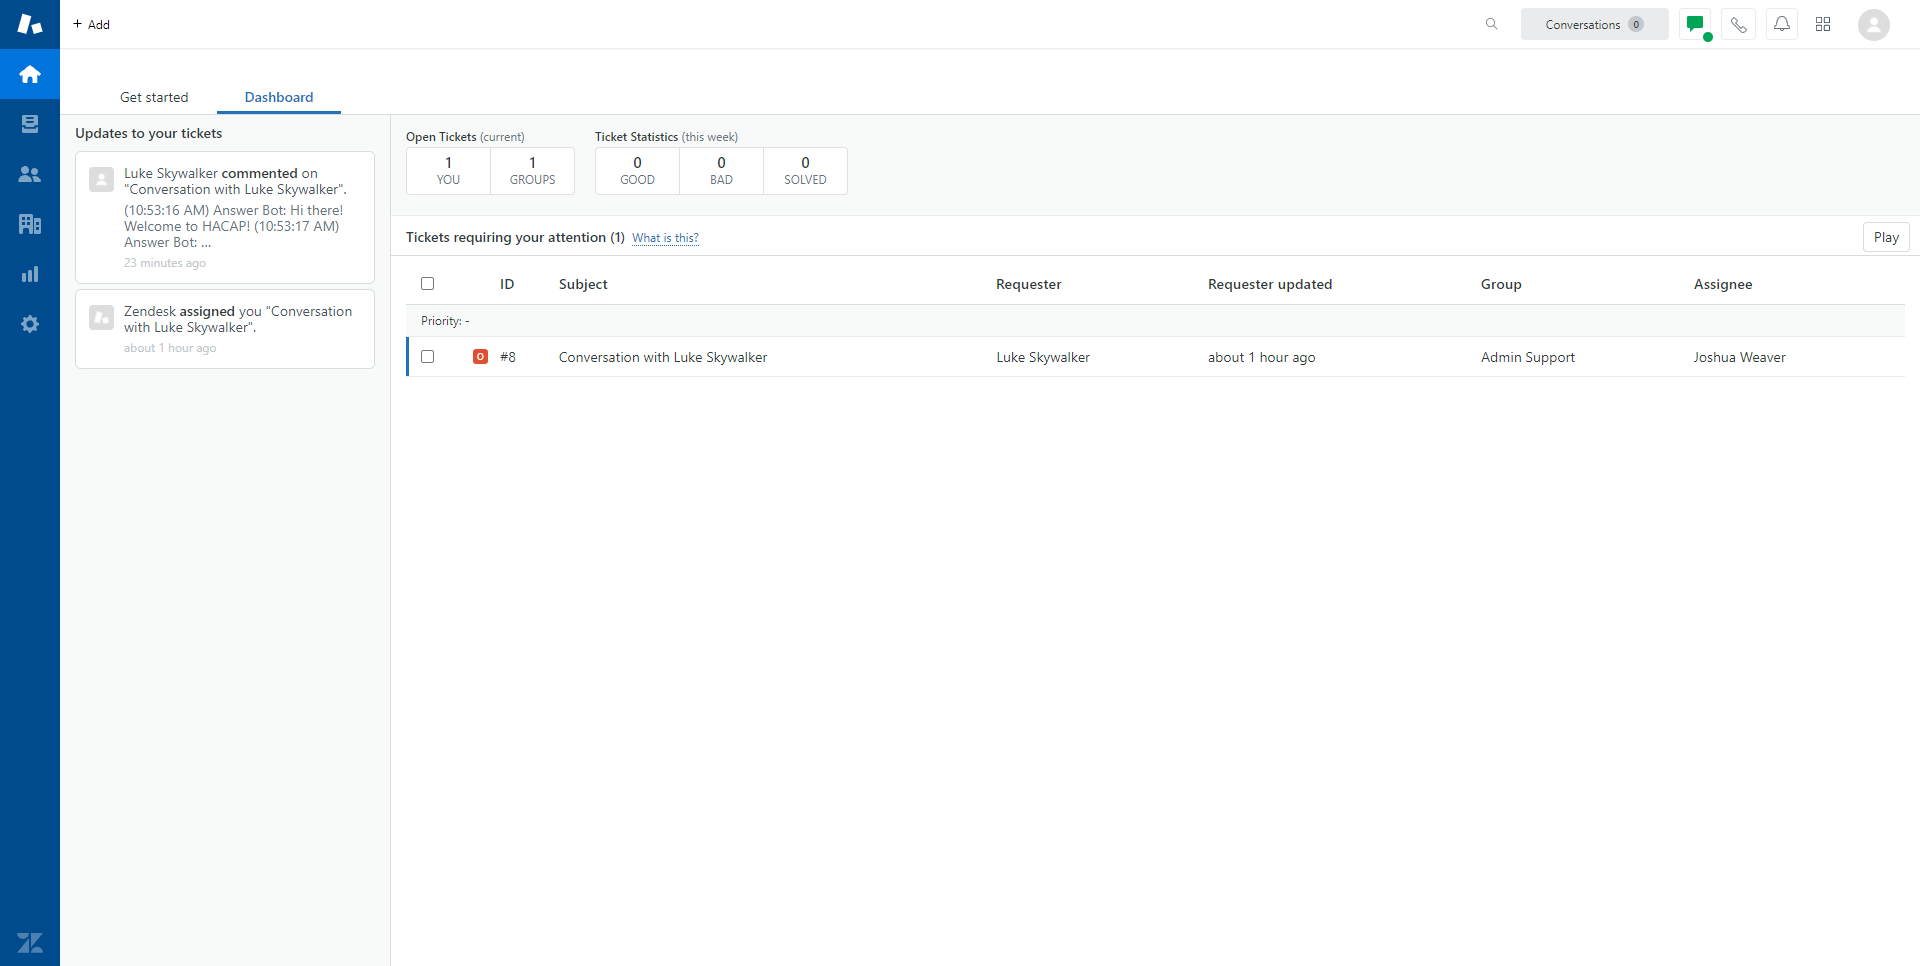
Click image to enlarge
This is the agent dashboard. All unresolved tickets assigned to the agent or group can be found here (for customer liaisons, all newly submitted tickets will be automatically assigned to the Customer Liaison dashboard). Clicking on a ticket will open up the ticket screen.
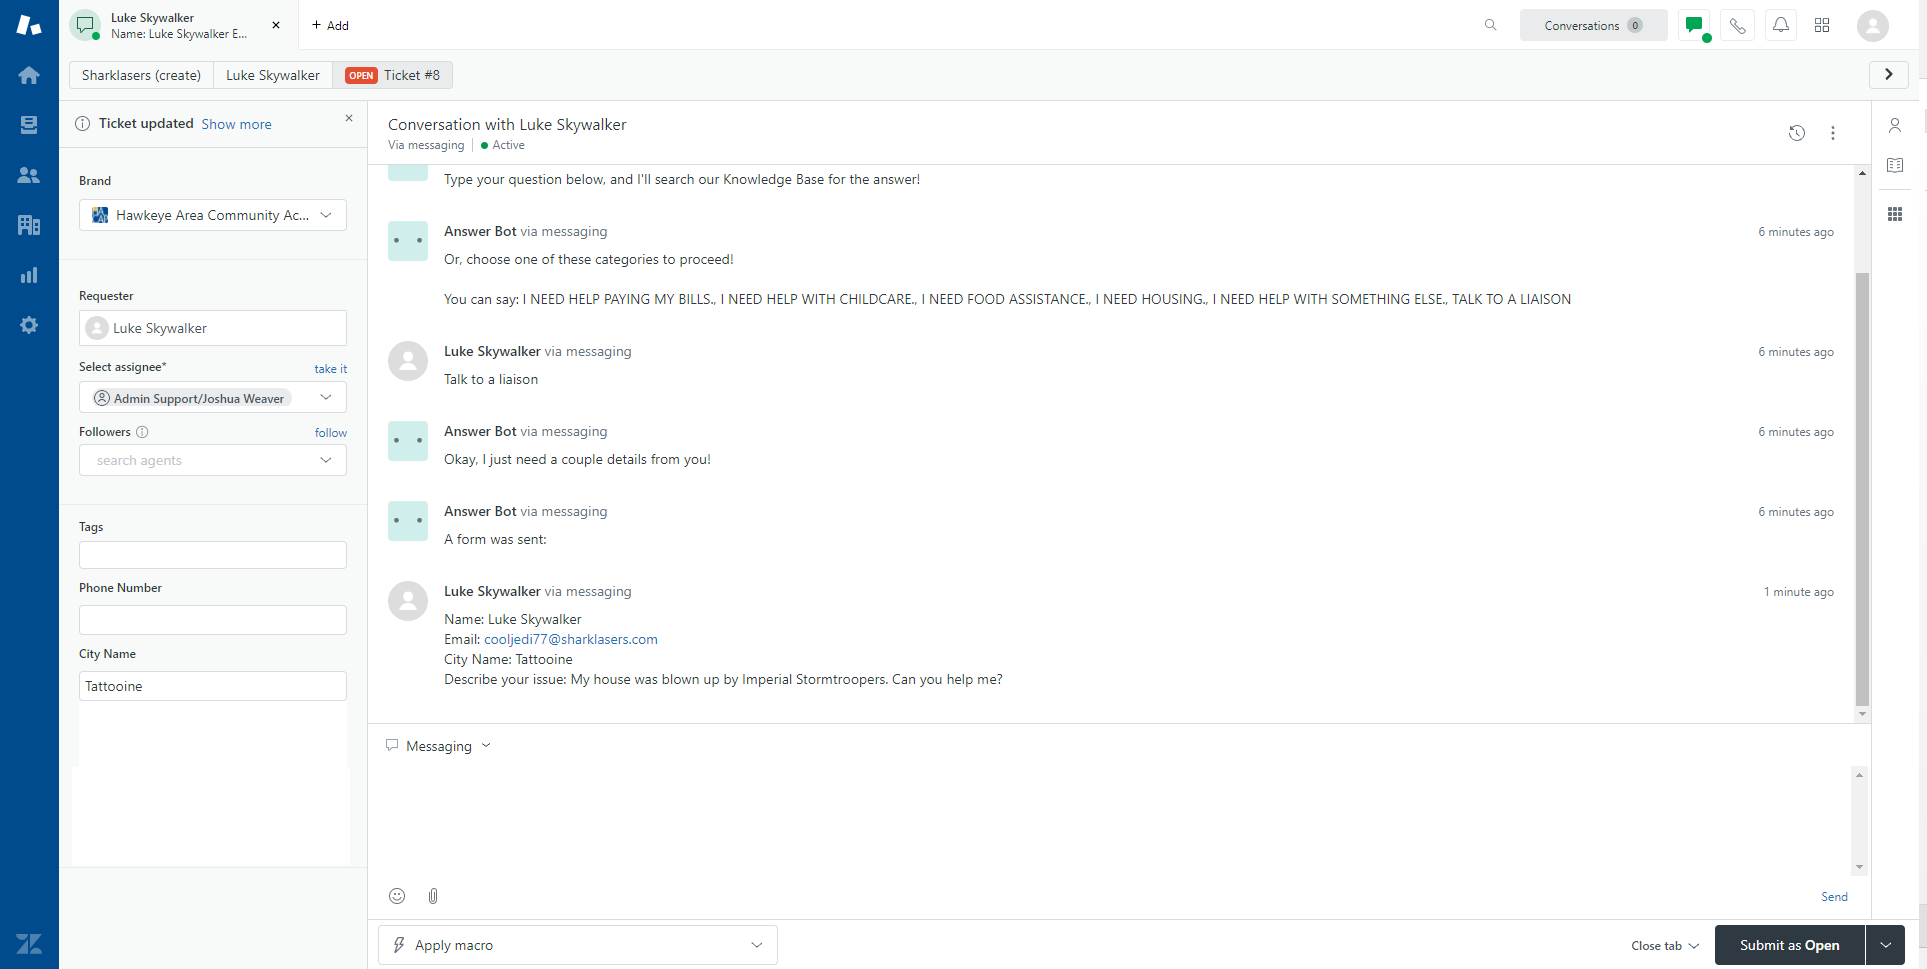
Click image to enlarge
This is the ticket screen. All client information is listed in the left-hand navigation bar, as well as ticket routing information. Most ticket sources (chat, email, etc.) will require the client to fill out this information when submitting the ticket, so it will be prepopulated once the ticket appears on the dashboard. The only exception are issues submitted over the phone; client information must be manually entered into a new ticket by a customer liaison (see Understanding Ticketing - Creating New Tickets).
This screen is also where agents communicate with the client. ZenDesk automatically formats incoming and outgoing information based on its destination output, which means the client never sees any unusual break or fault in communication.
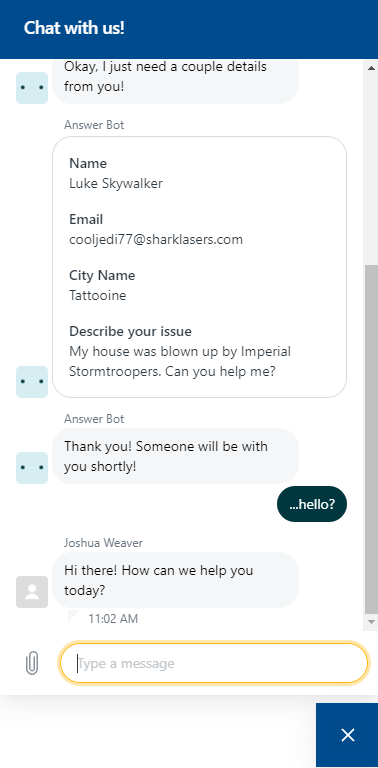
For example, if a client is communicating via chat, the client sees this:
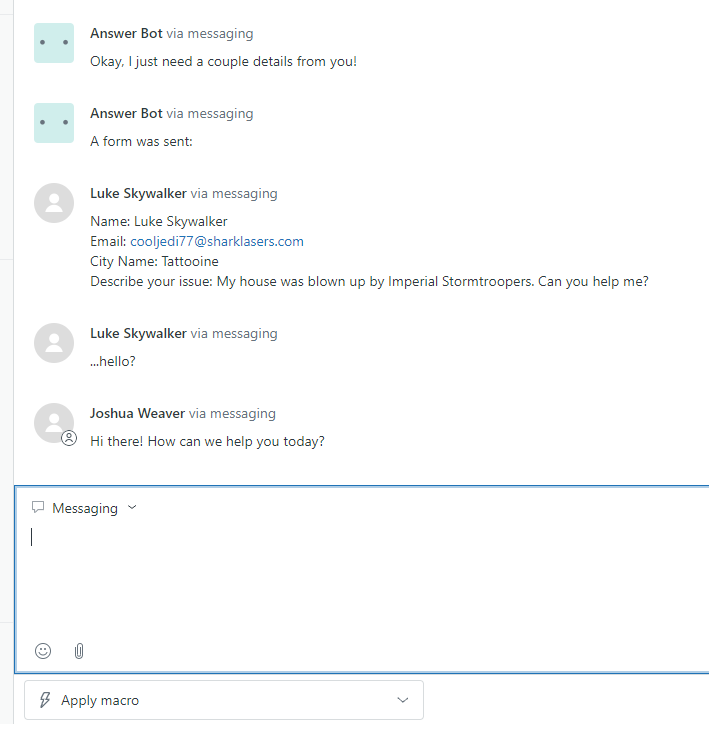
And the agent sees this:
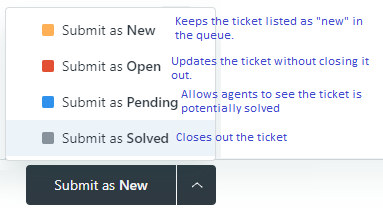
When an agent makes an alteration to a ticket, they are presented with four options to the submit button area. After the first alteration, the "Submit as New" option is removed, leaving only Open, Pending or Solved. By default, any update to the tickets should be Submitted as Open, with the exception of closing the ticket, which should be Submitted as Closed.
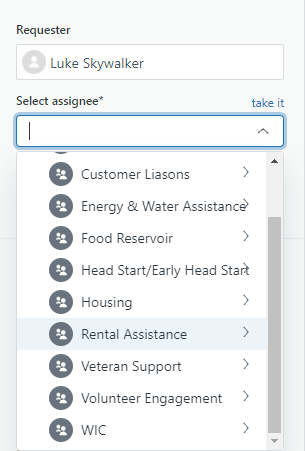
As previously mentioned, the ticket system also allows for agent reassignment, which can be accomplished in the "Select assignee" dropdown. Tickets moved this way can be assigned to a specific individual, or to a group at large. Agents can also claim tickets for themselves using the "take it" button above the dropdown menu. When attempting to take a ticket, after assigning the ticket to themselves an agent MUST click the "Submit" button.
When responding to a ticket, agents have a couple of options when adding new information to the ticket: "Public reply" updates the ticket and is visible to the client, while "Internal note" messages are only visible to other agents ("Call" is currently unsupported in HACAP's version of ZenDesk). Clicking on the "Messaging" dropdown in the upper left hand corner of the message box gives agents the ability to change their messaging option at will.

Zendesk keeps track of client information and ticket history, primarily based on their name and their email address. Agents can look into client ticket history and saved information by clicking on their name in the bar above the left-hand section of the ticket.
Comments
0 comments
Please sign in to leave a comment.